If the typical Windows 10 instructions did not work for your computer, try these alternative instructions for the UALR-WiFi network.
Step-by-step guide
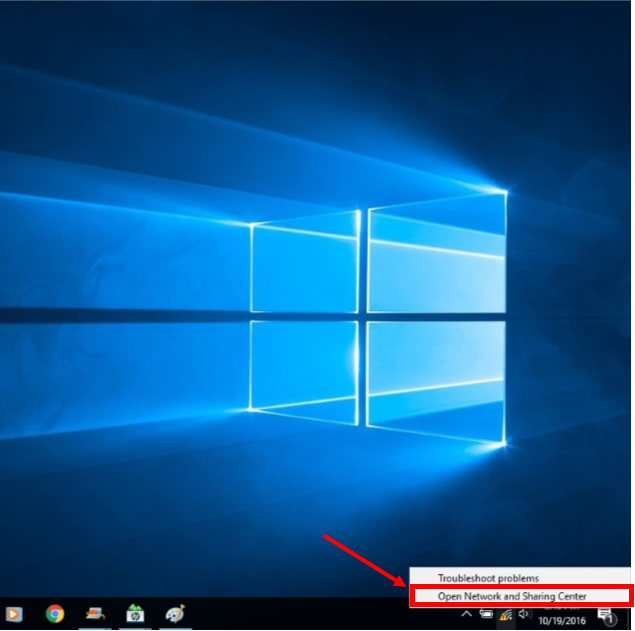
- Right click the network connection in the systems tray and select “Open Network and Sharing Center”
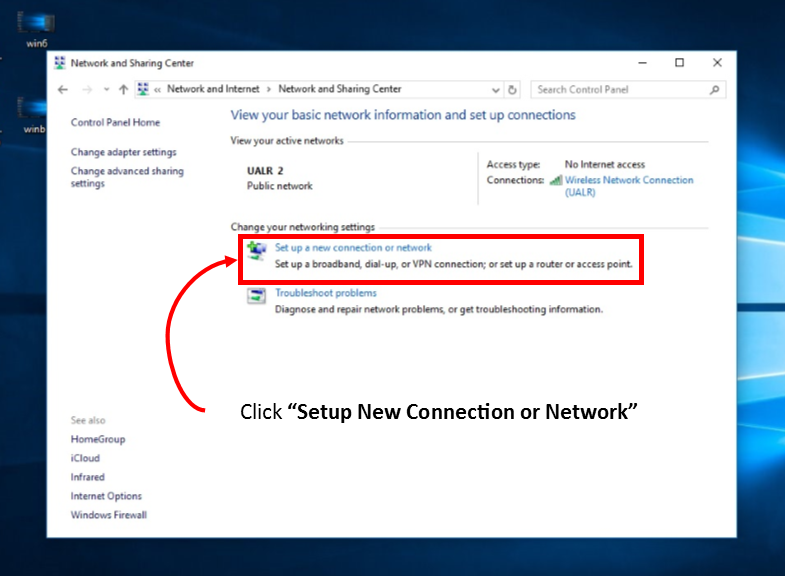
- Click “Setup New Connection or Network”
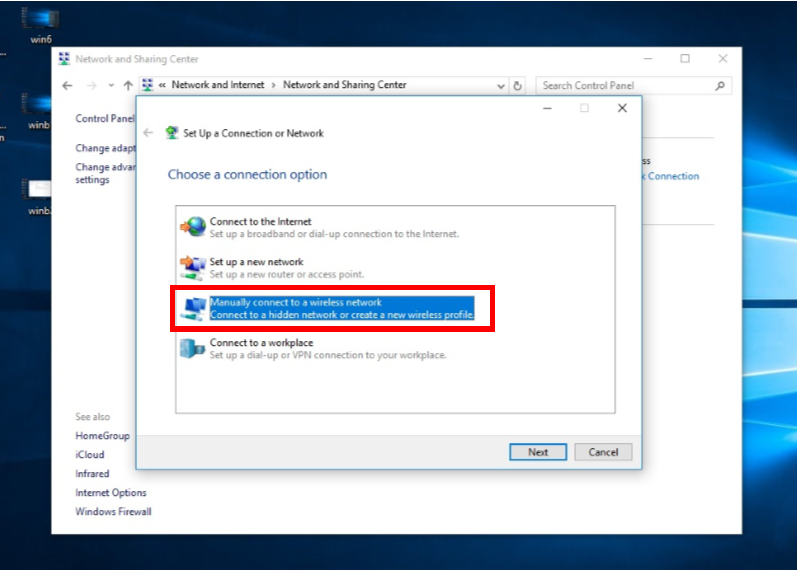
Click “Manually Connect to a Wireless Network”
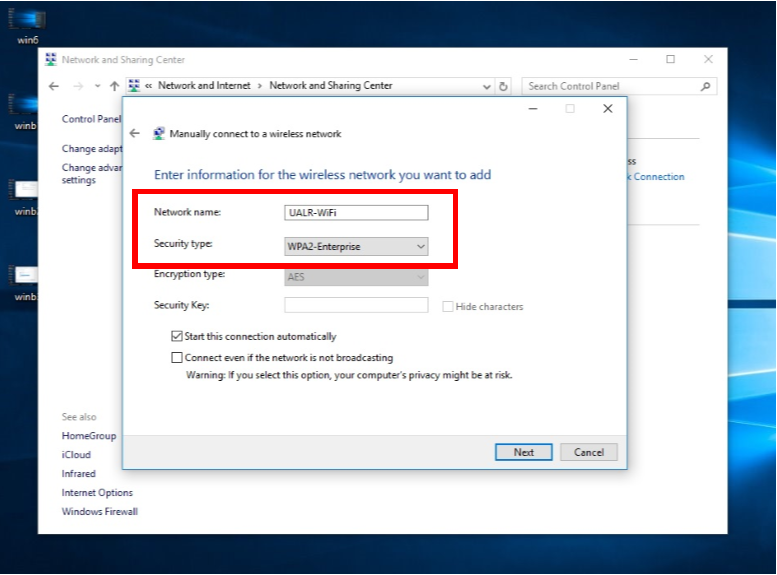
Enter the Network Name: UALR-WiFi (Remember the name is case sensitive), from the Security type drop down list, select WPA2-Enterprise, then select Next
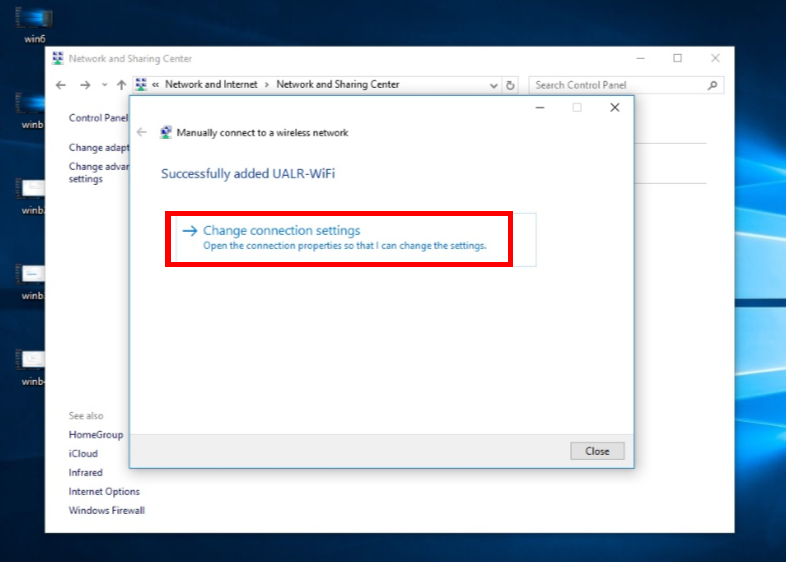
You have successfully added the UALR-WiFi Network. Click “Change connection settings”
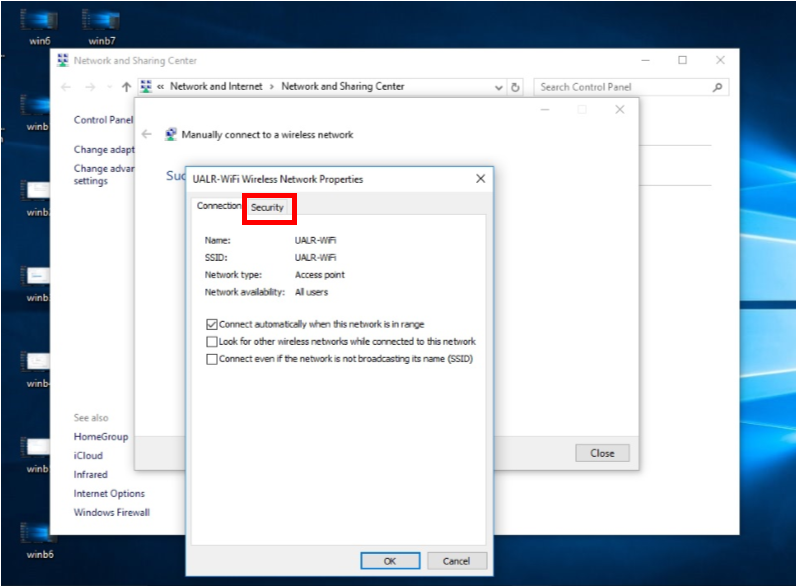
Click the Security Tab
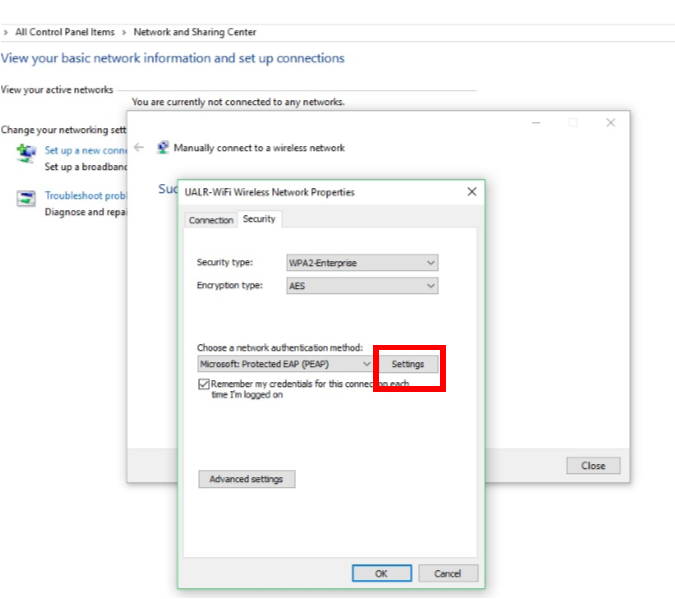
Click “Settings”
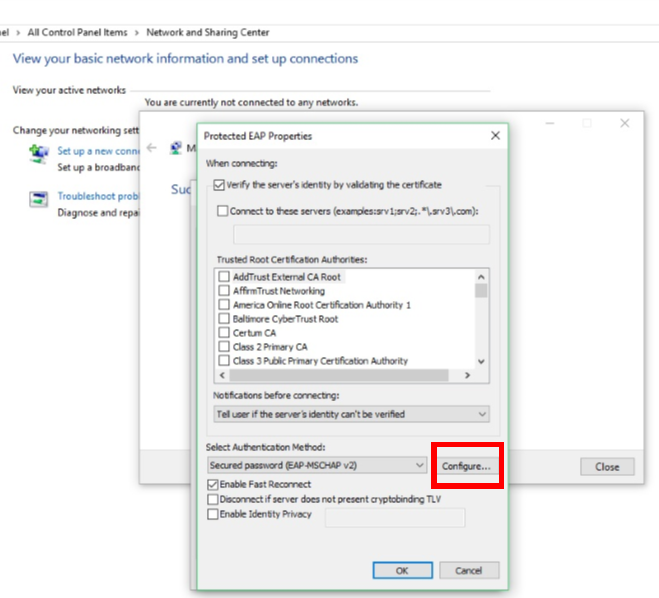
Click “Configure”
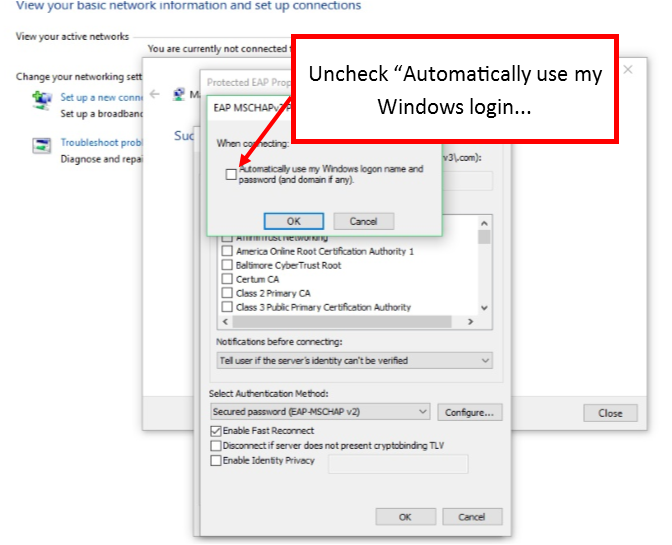
Uncheck “Automatically use my Windows login...
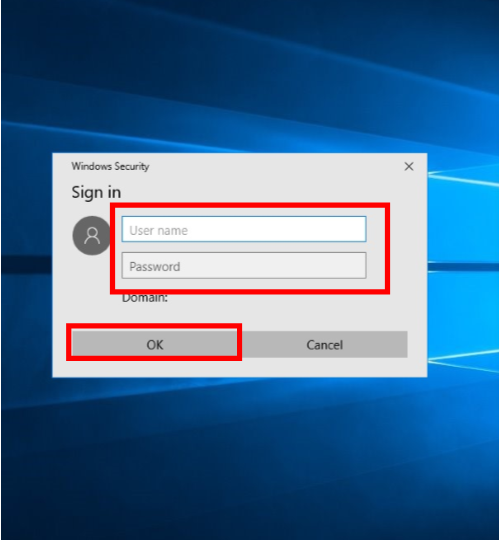
Enter your NetID and Password, then click OK
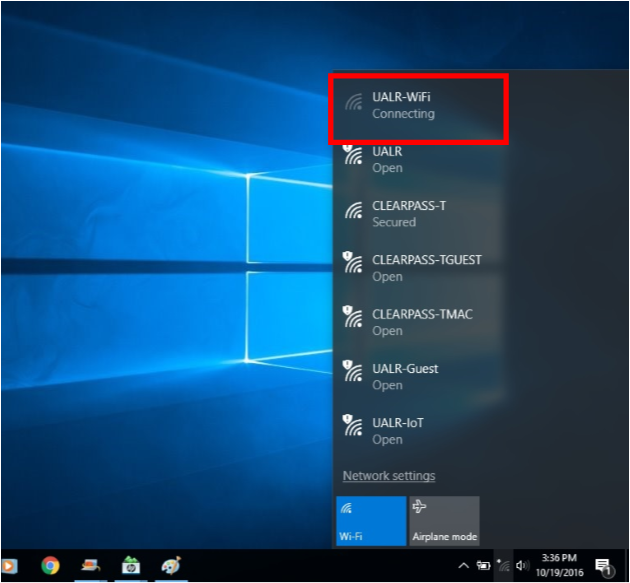
You are now connected to the network
Related articles