In order for your Ethernet based device to operate on UA Little Rock’s wired network, you must either configure your Ethernet adapter for dot1x connectivity (PC’s and devices with web browsers) or pre-register your device (Game consoles, SmartTV’s, any device WITHOUT a web browser).
/
Configure Microsoft Windows 10 for 802.1x
Configure Microsoft Windows 10 for 802.1x
- Former user (Deleted)
- Russ Riegel
- Former user (Deleted)
Owned by Former user (Deleted)
The preferred method is to configure your computer for dot1x connectivity [i.e. wired Ethernet connection]. Do not check the box for validate server certificate. This provides the most secure connection and is based on netID credentials.Step-by-step guide.
Connecting to Ethernet
PLEASE NOTE: In instances where students perform both options 1 and 2 for a single device, they are unable to connect to the internet. If you have performed both options and are unable to connect to the internet, log into https://access.ualr.edu and de-register the MAC address of your computer’s Ethernet adapter.
Option 1: How to configure your computer for wired dot1x capability
Enable Wired AutoConfig on your Computer
- Click the Start button and type services into the search box then click the Services option .
- In the services window scroll down to the service named Wired AutoConfig.
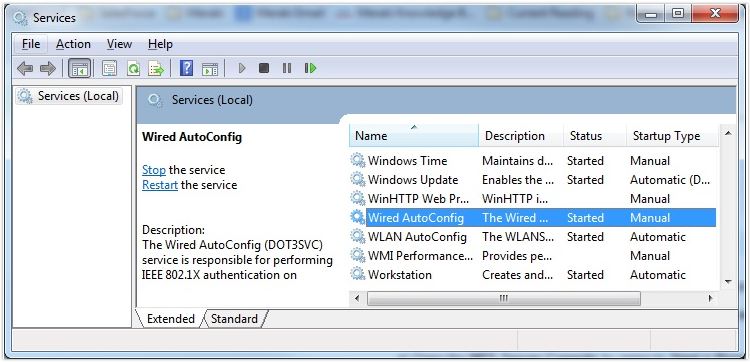
- Right click on this service and click on properties.
- Select the Startup Type Automatic, then click Start, Apply, and OK (in that order). You will be returned to your desktop.
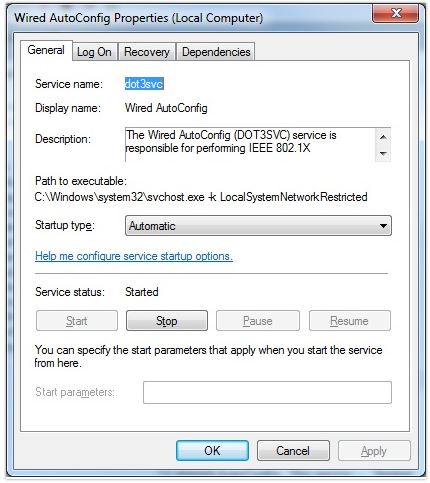
- Reboot your computer for the changes to take effect.
Configure the Local LAN connection for 802.1X authentication
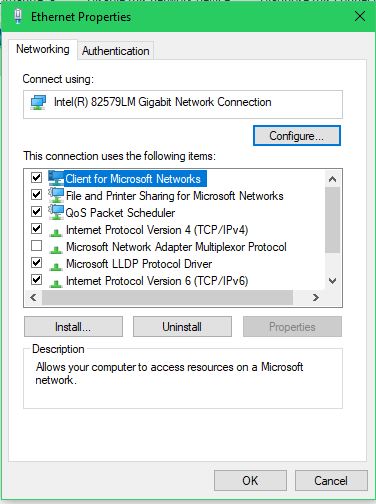
- Right click on your network adapter and select Open Network and Sharing Center.
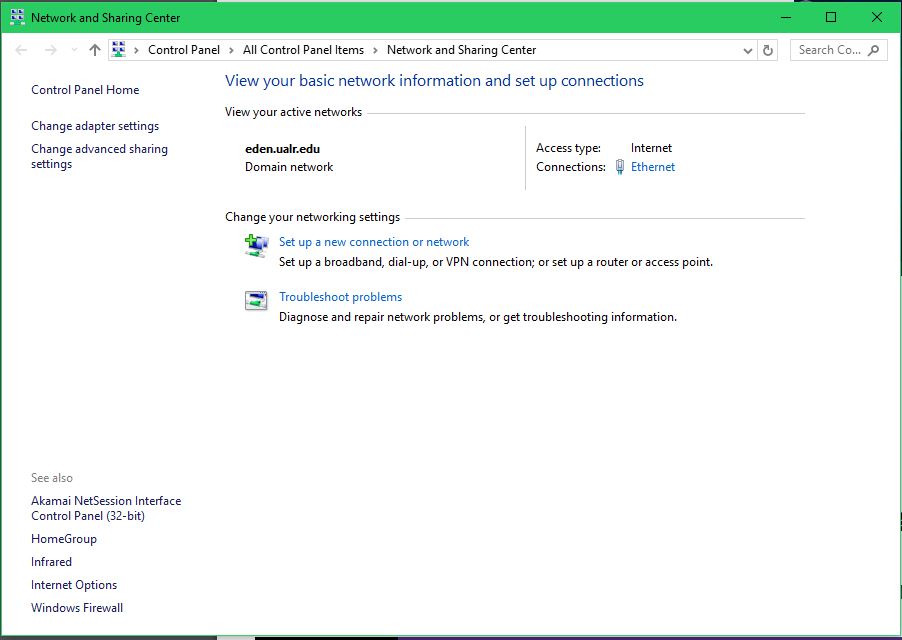
- Click Change Adapter Settings
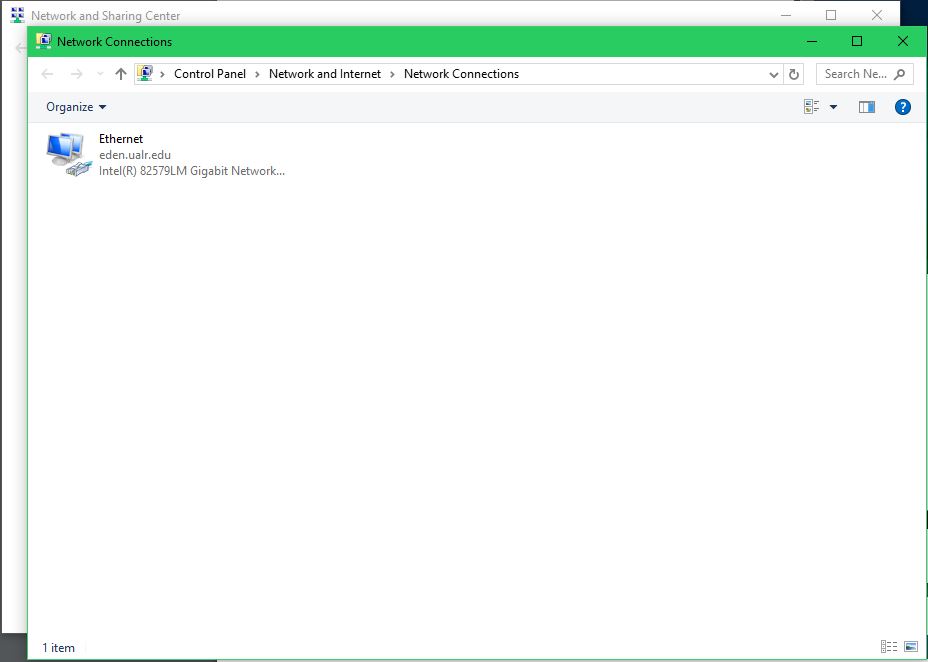
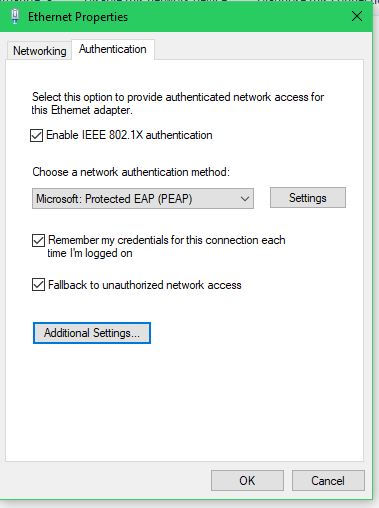
- Right-click the Ethernet icon and choose Properties. The Ethernet Properties dialog box opens.
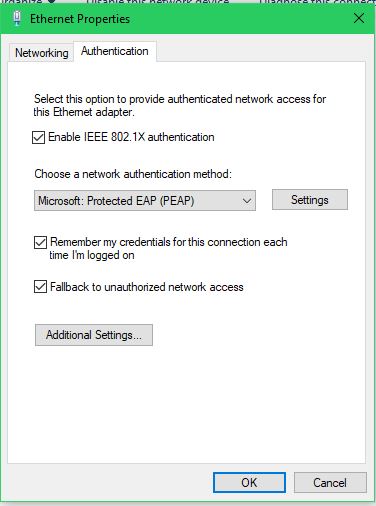
- Click the Authentication tab and choose the settings button.
- The Protected EAP Properties dialog box opens. From the Trusted Root Certification Authorities window, check the boxes next to the two Go Daddy certificates.
Be sure the box is checked next to "Verify the server's identity by validating the certificate".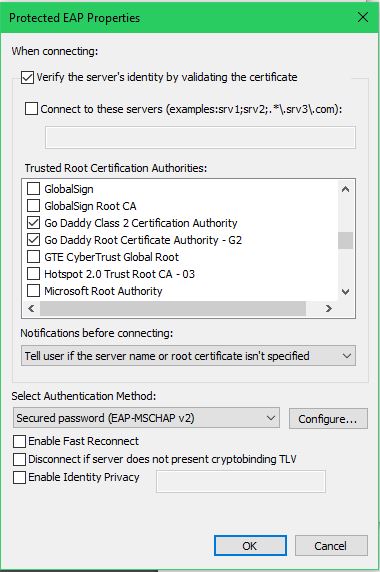
- Click Configure and make sure that the Automatically use my Windows logon name and password (and domain if any) checkbox is UNCHECKED.
k OK.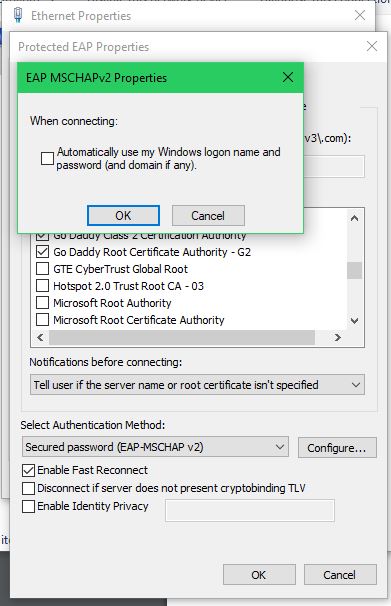
- Click Additional Settings
- Make sure the Specify Authentication mode box is checked.
From the drop-down box directly beneath, choose User authentication.
Click OK.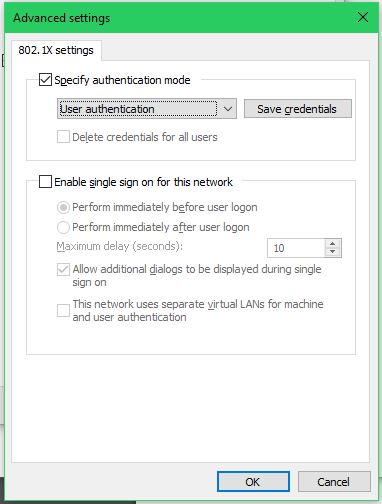
Click OK again and close the Network Connection window and the Sharing Center window.
Option 2: Pre-registering your wired computer
An alternate method is to pre-register your wired device. This method uses your device’s mac address for authentication and is somewhat less secure.
Registering a smart device or appliance on the network using its MAC address
, multiple selections available,
Related content
Wired Public Ports
Wired Public Ports
More like this
Wireless Networks
Wireless Networks
Read with this
Windows 11 802.1x Endpoint Configuration
Windows 11 802.1x Endpoint Configuration
More like this
Configure Microsoft Windows 10 to join UALR-WiFi
Configure Microsoft Windows 10 to join UALR-WiFi
More like this
Configure Microsoft Windows 10 to join UALR-WiFi (alternative instructions)
Configure Microsoft Windows 10 to join UALR-WiFi (alternative instructions)
More like this
Configure Microsoft Windows 7 for 802.1x
Configure Microsoft Windows 7 for 802.1x
More like this